Upload Files
Overview
Upload geospatial data from your computer to AcuGIS Cloud by using either of these Web workflows:
- Upload from a Library folder when you already know where the dataset belongs and want the shortest path.
- Add Data Wizard when you want to inspect the source first and choose whether to store it in the Library or import it to PostGIS.
Both workflows create a Library dataset that you can preview and manage. The controls available after upload depend on the file type and your permissions.
Before You Begin
- Sign in to an active AcuGIS Cloud account.
- Confirm that you have permission to add data to the destination Library folder.
- Prepare a supported geospatial data file.
- If the format uses companion files, keep all required components together when preparing the upload.
- Know the source coordinate reference system (CRS). A missing or incorrect CRS can place features in the wrong location.
Use a descriptive filename
The uploaded dataset is named from the source file. Rename unclear files before upload so that they are easy to identify in the Library.
Step-by-Step
Upload from a Folder
Use this workflow to place a file directly into a specific Library folder.
1. Open the destination folder
Open My Drive, find the folder where the dataset belongs, and click Open Folder.
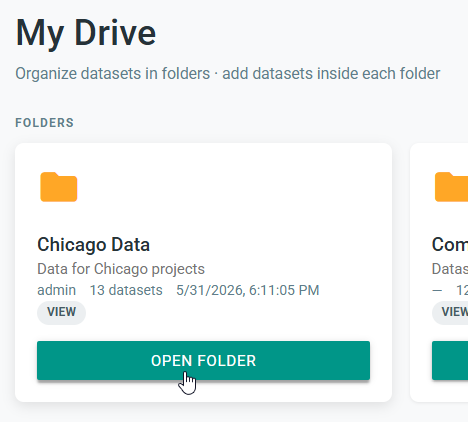
Caption: Choose the Library folder that will contain the uploaded dataset.
2. Select Upload File
In the folder, click Add Dataset, then select Upload File.
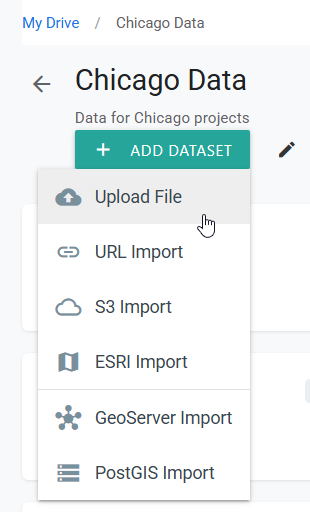
Caption: Upload File is one of the data-source options available inside a Library folder.
3. Choose and upload the file
Click File and select the dataset from your computer. Confirm that the correct filename appears, choose any available ingest or publishing options required for your workflow, and click Upload.
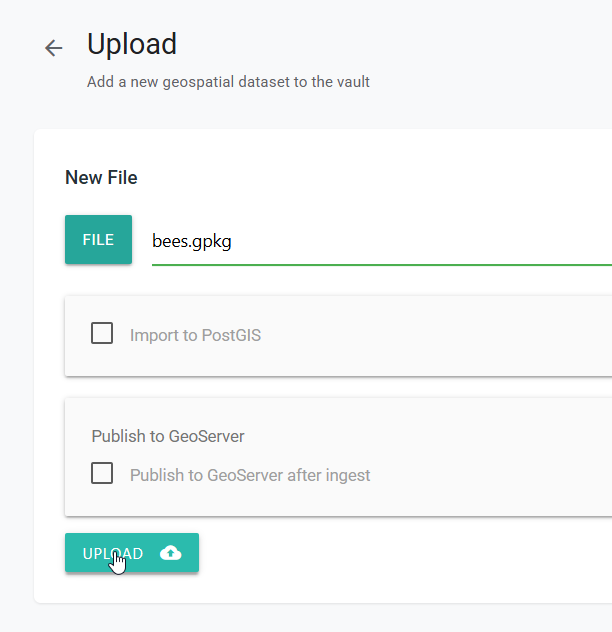
Caption: Review the selected filename and optional processing choices before starting the upload.
Optional processing
Import to PostGIS and Publish to GeoServer after ingest are optional and may be unavailable for some files or accounts. Leave them clear when you only need to store the file in the Library.
Do not close or refresh the page while the file is being transferred and processed.
4. Verify the dataset
When processing finishes, open the dataset. Select a layer from the Layer list and confirm that its features appear on the map. For editable data, open Edit Data and select a feature to inspect its attributes.
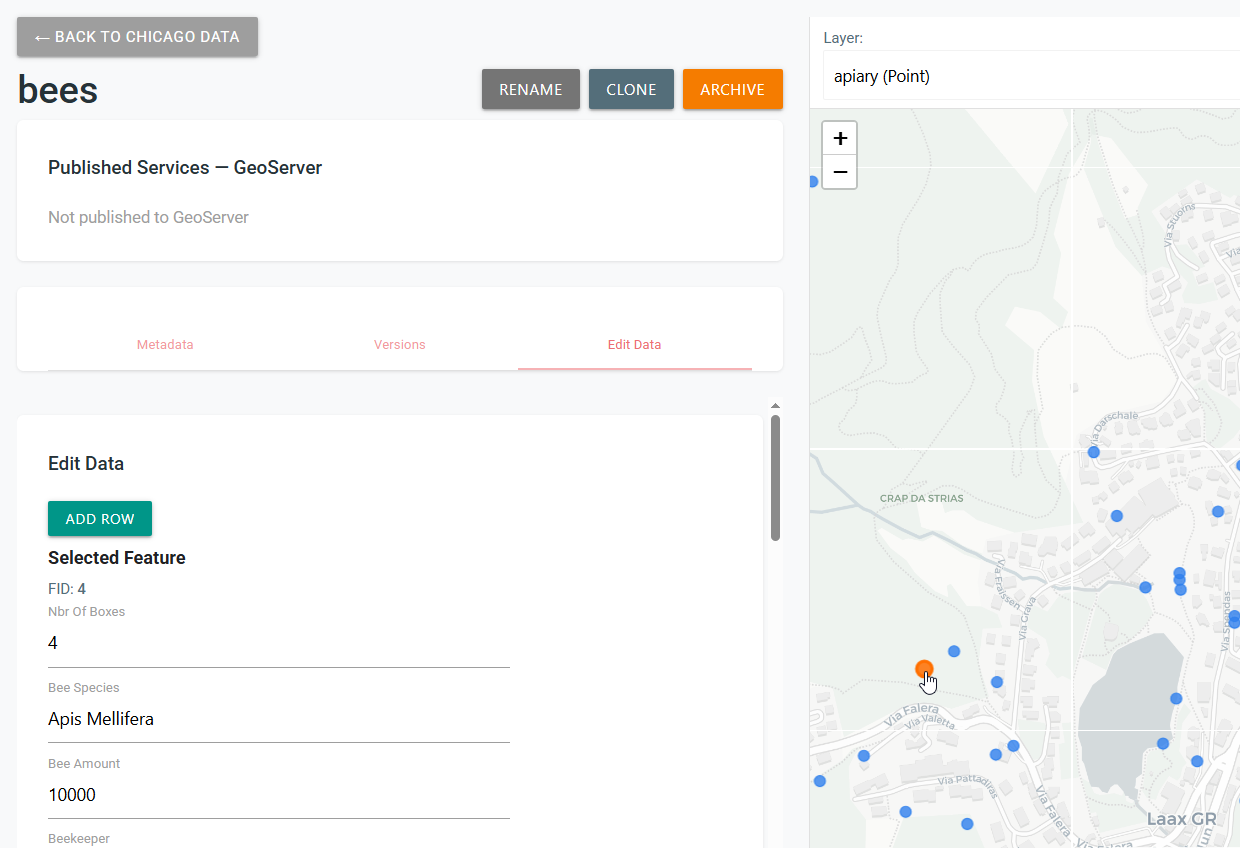
Caption: A visible layer, mapped features, and readable attributes confirm that the dataset was processed successfully.
Upload with Add Data Wizard
Wizard is useful when you want to preview a source and select its destination action before completing the import.
1. Open Wizard
Open Administration, then select Wizard.
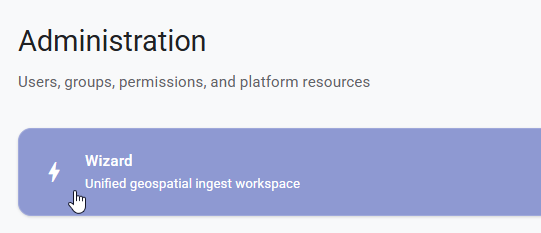
Caption: Wizard opens the unified geospatial ingest workspace.
2. Add a Data Files source
Click Add Source if the source chooser is not already open. Select Data Files, then choose the file from your computer.
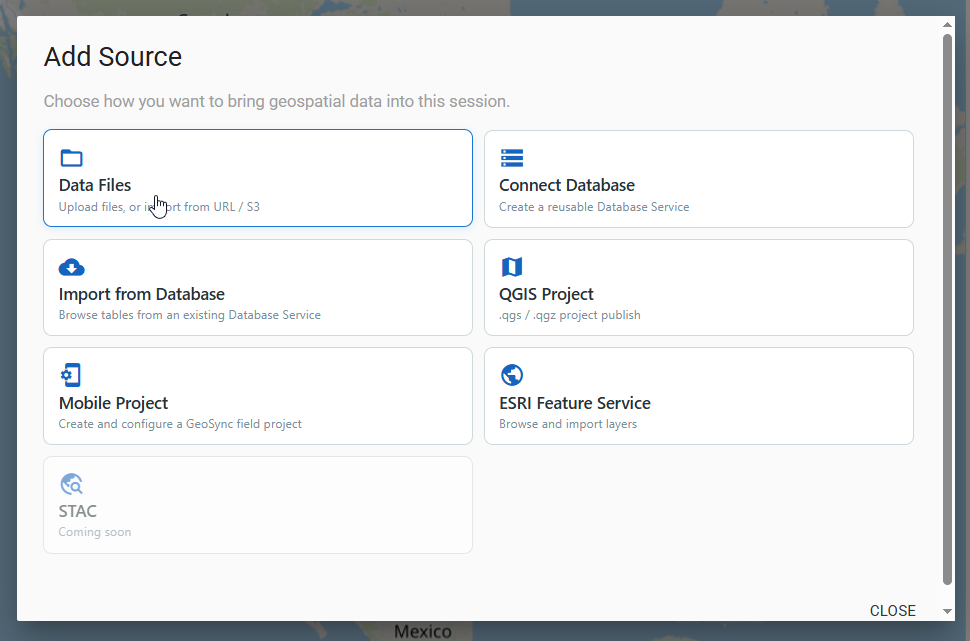
Caption: Data Files accepts local file uploads; the other choices start different import workflows.
3. Review the preview
Wait for the source status to show Ready, then inspect:
- The source name, detected type, size, and layer count
- The map preview and feature extent
- Detected geometry and CRS
- Any warnings listed in the Details panel
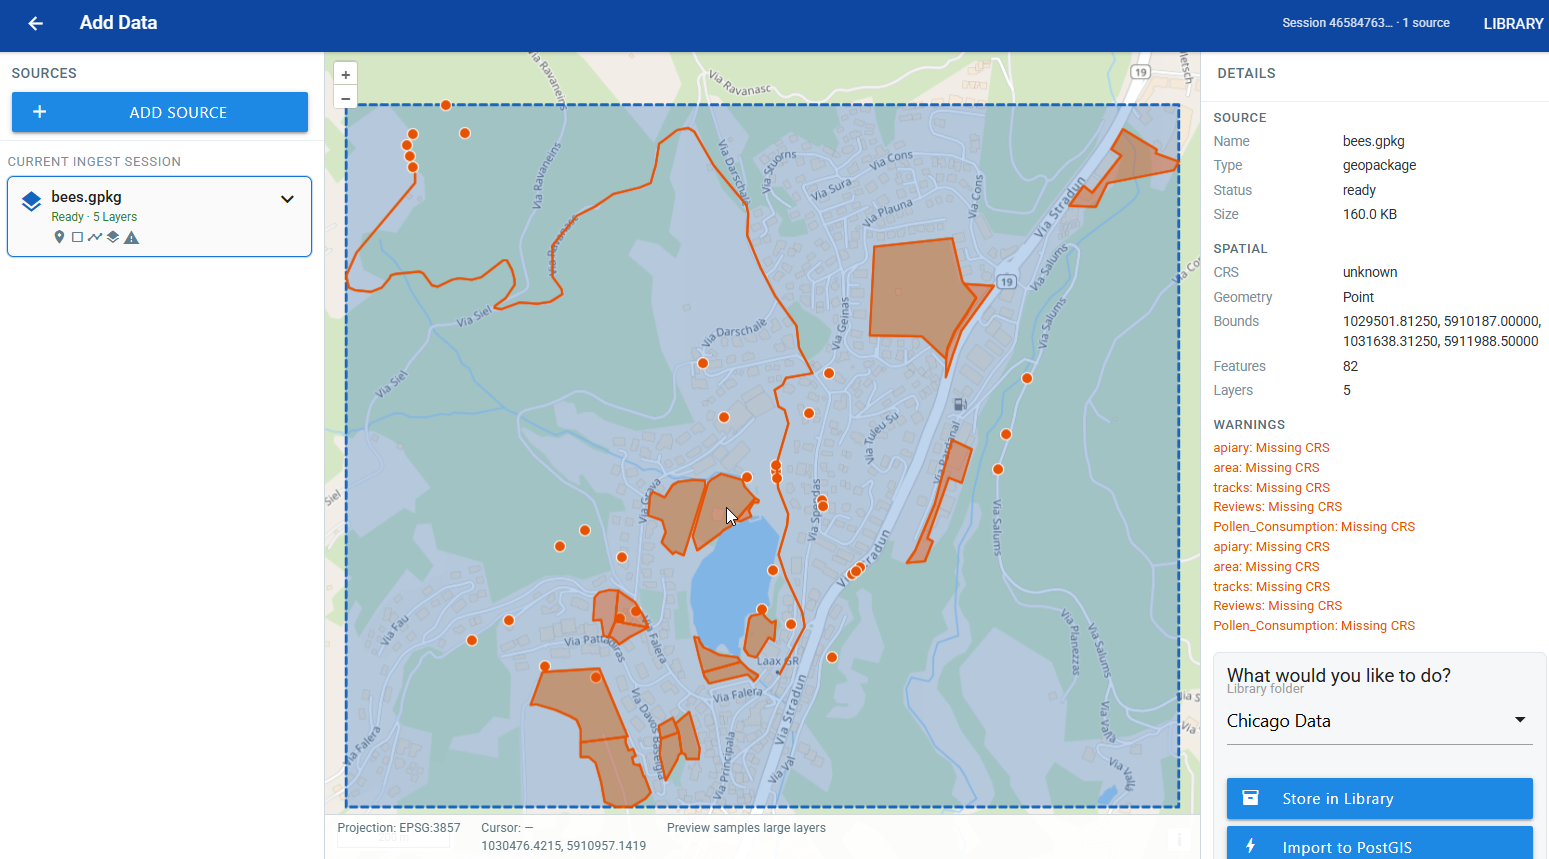
Caption: Preview the source and resolve important warnings before choosing a destination.
Do not ignore CRS warnings
A Missing CRS warning means Wizard could not determine a layer's coordinate reference system. If the map preview is misplaced or the CRS is unknown, correct or define the CRS in the source data and upload it again.
4. Choose the folder and destination action
In What would you like to do?, select the target Library folder, then choose:
- Store in Library to keep the uploaded dataset as a managed Library item.
- Import to PostGIS to ingest the data into a PostGIS destination.
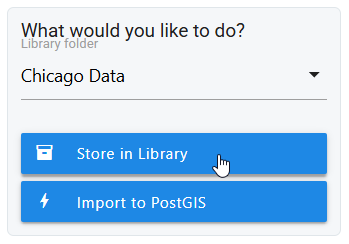
Caption: Select the Library folder first, then choose the action that matches how the data will be used.
This guide follows Store in Library. If you choose Import to PostGIS, complete the additional destination and connection prompts shown by Wizard.
5. Verify the stored version
After Wizard finishes, open the dataset in the selected Library folder and choose Versions. Confirm that the newest upload is marked latest, click Preview, and check that the expected layer features appear on the map.
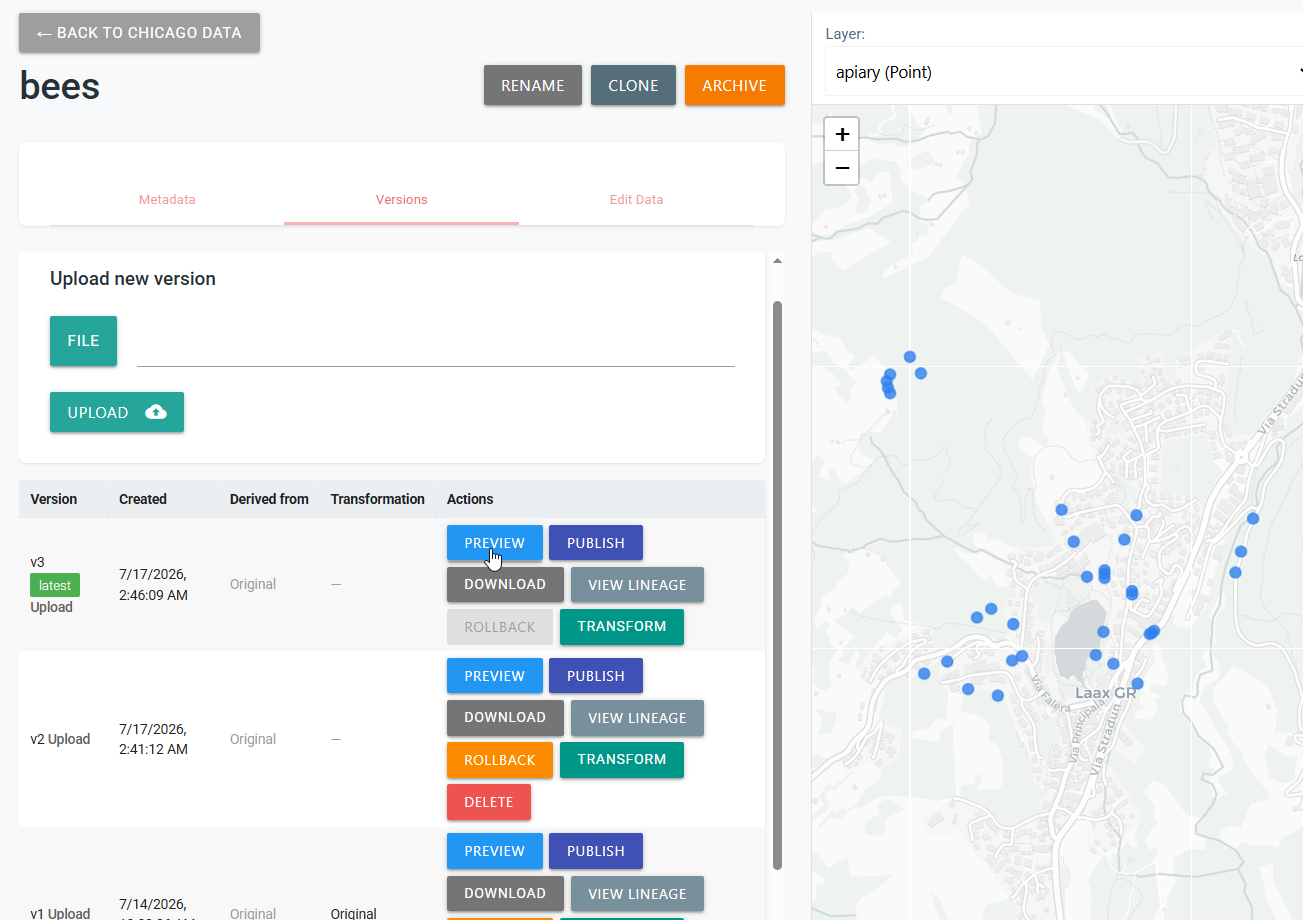
Caption: The latest version entry and a correct map preview confirm that Wizard stored and processed the upload.
Tips
Choose the shortest suitable workflow
Upload from a folder for a quick, known destination. Use Wizard when you need source inspection, warning review, or a choice between Library storage and PostGIS import.
Validate the preview
Check more than the upload status. Confirm the layer count, geometry type, feature location, and a few attribute values before using the dataset in maps or applications.
Keep source data available
Retain the original file until verification is complete. If processing exposes a CRS, schema, or geometry problem, correct the source and upload a new version.
Common Problems
The file cannot be selected
Confirm that the file extension is supported by the file picker and that the file is not open or locked by another application. For formats with required companion files, make sure the complete dataset was prepared for upload.
Upload does not finish
Wait for processing to complete before navigating away. If progress stops, check your network connection, retry the upload, and use a smaller file to determine whether the issue is related to file size. Contact your administrator if account storage or upload limits may have been reached.
Wizard reports Missing CRS
Define the correct CRS in the source data and upload it again. Do not assign a CRS based only on how the preview looks; use the CRS documented by the data provider.
Features appear in the wrong place or do not appear
Select the expected layer and zoom to its extent. Then check the detected CRS and geometry type. A wrong or missing CRS is the most common cause of features appearing outside the expected area.
The destination folder is unavailable
Confirm that you selected the correct folder and have permission to add datasets there. Ask the folder owner or an administrator for access if it does not appear in the destination list.
Import or publish options are disabled
These options depend on the source format, configured services, and your permissions. Store the file in the Library, or ask an administrator to confirm that PostGIS or GeoServer is configured for your account.
The new data is not reflected in an existing dataset
Open Versions and confirm that the intended upload is marked latest. Use Preview to inspect it. If necessary, upload the corrected file as a new version rather than creating an unrelated dataset.