Users
Overview
Administrators can create users, assign them to groups, update their details, reset their passwords, and temporarily disable their access. AcuGIS Cloud grants user authorization through group membership, so a user must belong to the appropriate role (group) to access protected resources.
Before You Begin
- Sign in to AcuGIS Cloud with an account that can administer users.
- Decide on a unique username and a valid email address for the new user.
- Create any required groups before adding the user.
- Decide which groups provide the minimum access the user needs.
Handle passwords securely
Use a strong initial password and deliver it through an approved secure channel. Do not send passwords in the same message as usernames or other sign-in details.
Open User Administration
From the top navigation, open Administration. Under Identity, select Users.
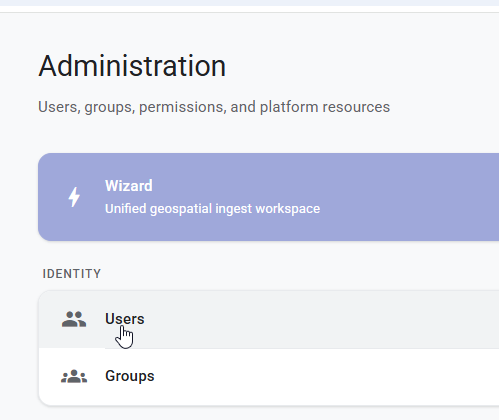
Caption: The Users and Groups workspaces are available in the Identity section of Administration.
The Users page shows each account's username, email, status, group membership, creation time, and available actions. Use Search users to find an account when the list is long.
Create a User
1. Open the Create user form
On the Users page, select the option to create a user. Enter the user's:
- Username — the unique name used to identify the account.
- Email — the address associated with the account.
- Password — the initial sign-in password.
- Enabled status — leave selected when the user should be able to sign in immediately.
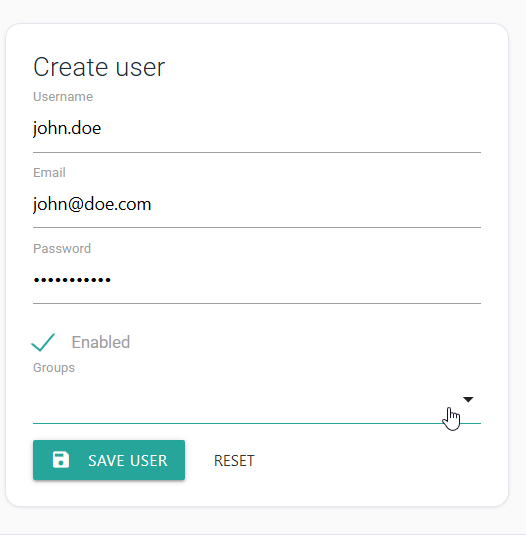
Caption: Complete the required identity fields and choose whether the account starts enabled.
2. Select groups
Open Groups, then select one or more groups. The user receives authorization from the combined group memberships.
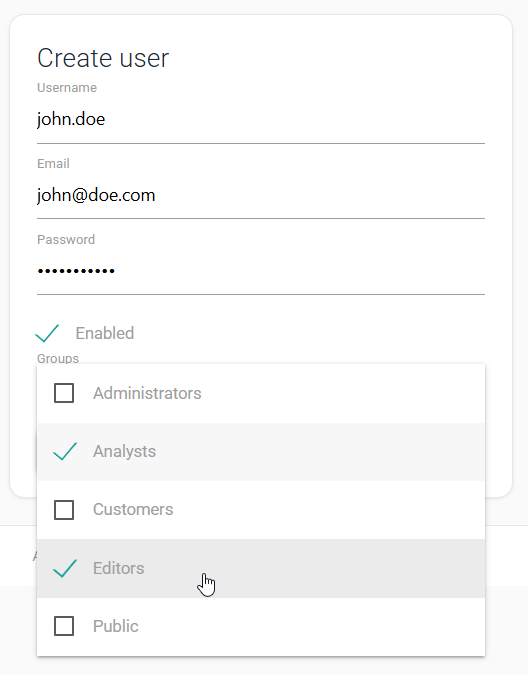
Caption: Select every group required for the user's responsibilities.
Apply least privilege
Start with the smallest set of groups needed for the user's work. Add access later when a confirmed requirement arises.
3. Save the account
Review the values, then click Save User.
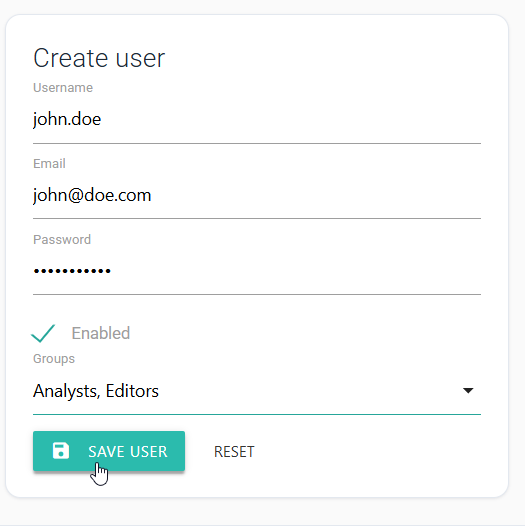
Caption: The selected groups are displayed in the Groups field before the account is saved.
4. Verify the user
Return to the Users list and confirm that the new row contains the expected email, Enabled status, and group labels.
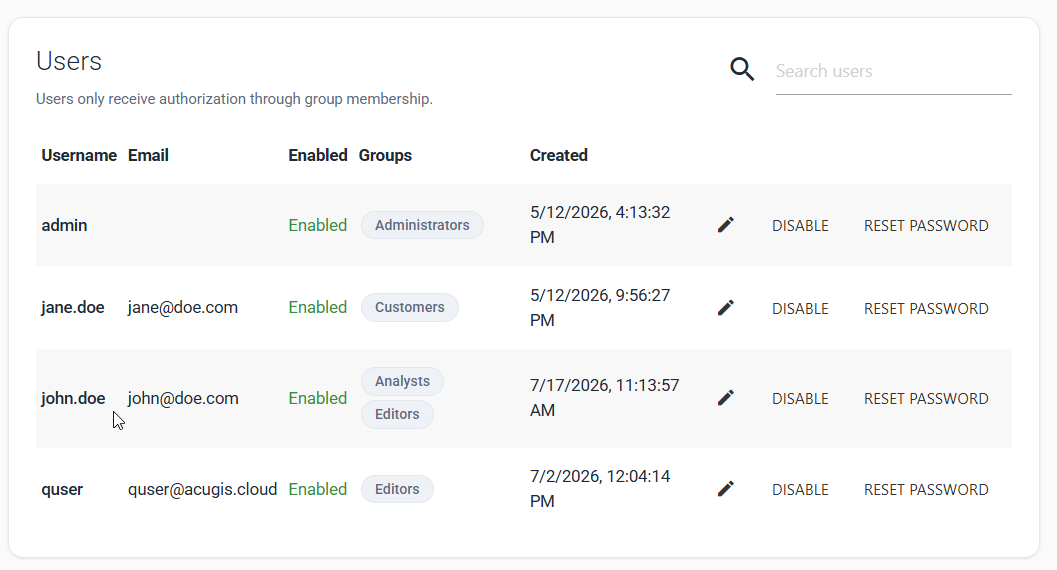
Caption: The new account is enabled and receives access through the Analysts and Editors groups.
Edit a User
1. Select the user
Find the account in the Users list and click its pencil icon.
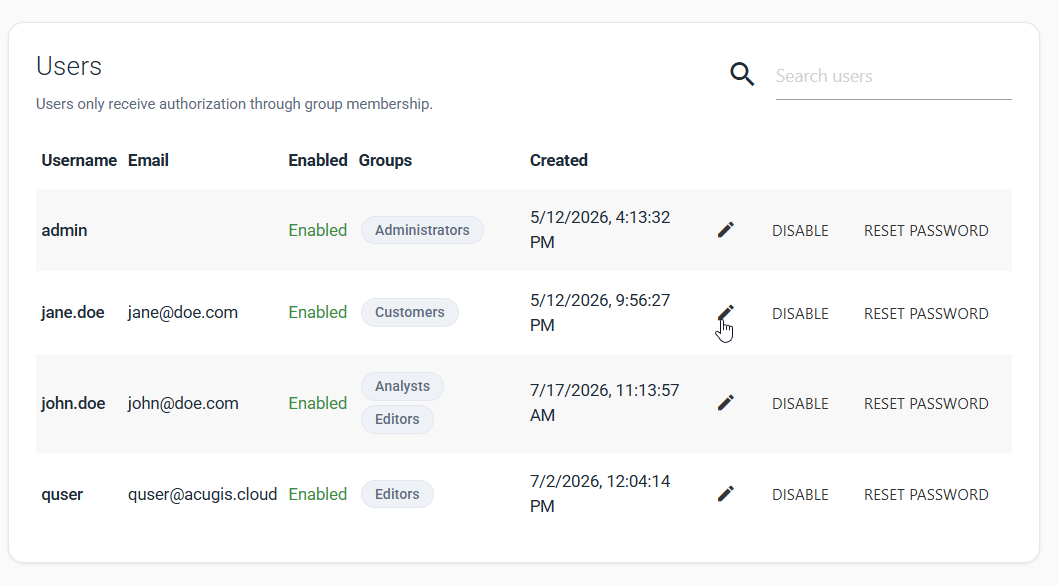
Caption: Each user row provides edit, enable or disable, and password-reset actions.
2. Update the account
Change the email address, Enabled status, or group memberships as needed, then click Save User. The username is displayed as read-only and cannot be changed from this form.
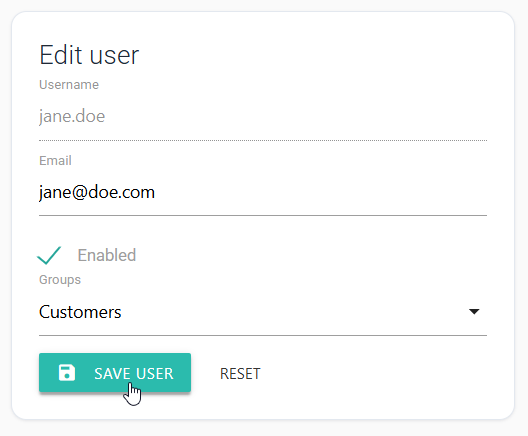
Caption: Edit the account attributes and group assignments, then save the changes.
Review access after a role change
When a person's responsibilities change, remove groups that are no longer required as well as adding new ones.
Reset a User's Password
Find the account and click Reset Password.
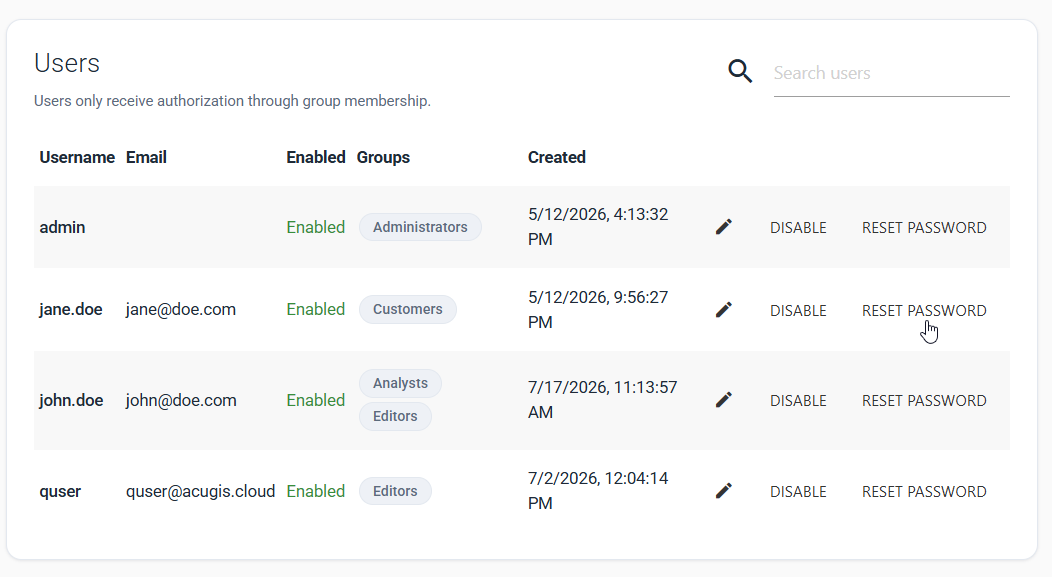
Caption: Reset Password starts the password-reset workflow for the selected account.
Complete the displayed reset prompt. Deliver any temporary password or reset instructions through an approved secure channel, and verify that the user can sign in.
Confirm the correct row
Check the username and email before resetting a password. Resetting the wrong account can interrupt another user's work.
Disable or Re-enable a User
Disable an account when access must be suspended without removing its identity and group assignments.
1. Disable the account
Find the enabled user and click Disable.
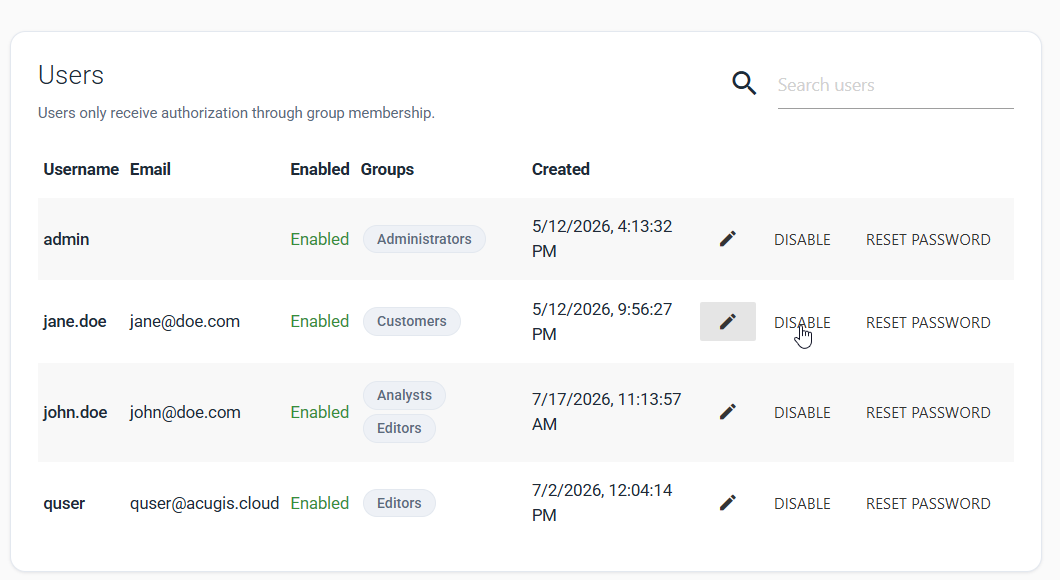
Caption: Disable is available on each enabled, non-protected user row.
2. Verify the status
Confirm that the status changes to Disabled and that the row action changes to Enable.
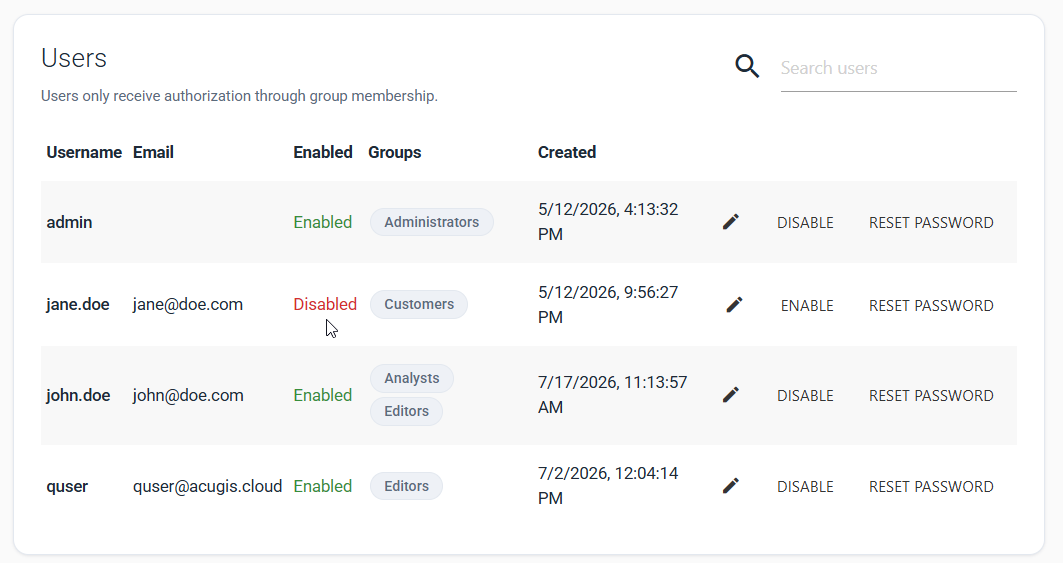
Caption: A disabled account retains its group memberships but is marked as unavailable for sign-in.
To restore access, click Enable on the user's row and confirm that the status returns to Enabled.
Disabling is not deletion
Disabling preserves the account and its group memberships so it can be re-enabled. Review owned resources and integrations separately when offboarding a user.
Tips
Use groups consistently
Assign access through purpose-based groups instead of trying to manage users individually. This makes onboarding and role changes easier to audit.
Verify every change
After creating or editing a user, check the Users list for the expected status and group labels. If possible, have the user confirm access to the required workspace.
Troubleshooting
The user cannot sign in
Confirm that the account is Enabled, the username is correct, and the current password is being used. Reset the password if necessary. If sign-in still fails, ask a platform administrator to review authentication logs and account policy.
The user can sign in but cannot access a resource
Check the user's group labels in the Users list. Add the group that grants the required resource access, or correct the group's resource permissions. Signing in successfully does not by itself grant access to protected resources.
The expected group is not available
Create the group first or ask a group administrator to do so. Refresh the Create or Edit user form, then open the Groups list again.
Save User does not complete
Check that required fields are present, the username is unique, the email is valid, and a password was supplied for a new user. Correct highlighted fields and retry.
The account was disabled accidentally
Locate the user and click Enable. Confirm that the status changes to Enabled, then ask the user to try signing in again.