Roles and Groups
Overview
AcuGIS Cloud implements roles as groups. Users receive authorization through group membership, allowing administrators to manage access for a team or job function instead of configuring each user separately.
Typical groups include:
- Administrators for full platform administration.
- Analysts for users who analyze and consume assigned resources.
- Editors for users who edit assigned resources.
- Customers for customer users with assigned resource access.
- Custom groups for a project, department, client, or other shared responsibility.
Protected platform groups
Administrators and Public are protected platform groups. They can be edited where the interface permits, but they cannot be deleted. Public represents public and unauthenticated access, so review changes to it carefully.
Before You Begin
- Sign in with an account that can administer groups.
- Define the group's purpose and use a name that remains clear as the organization grows.
- Identify the initial members.
- Follow least privilege: group membership should provide only the access required for the role.
View Groups and Membership
Open Administration and select Groups under Identity.
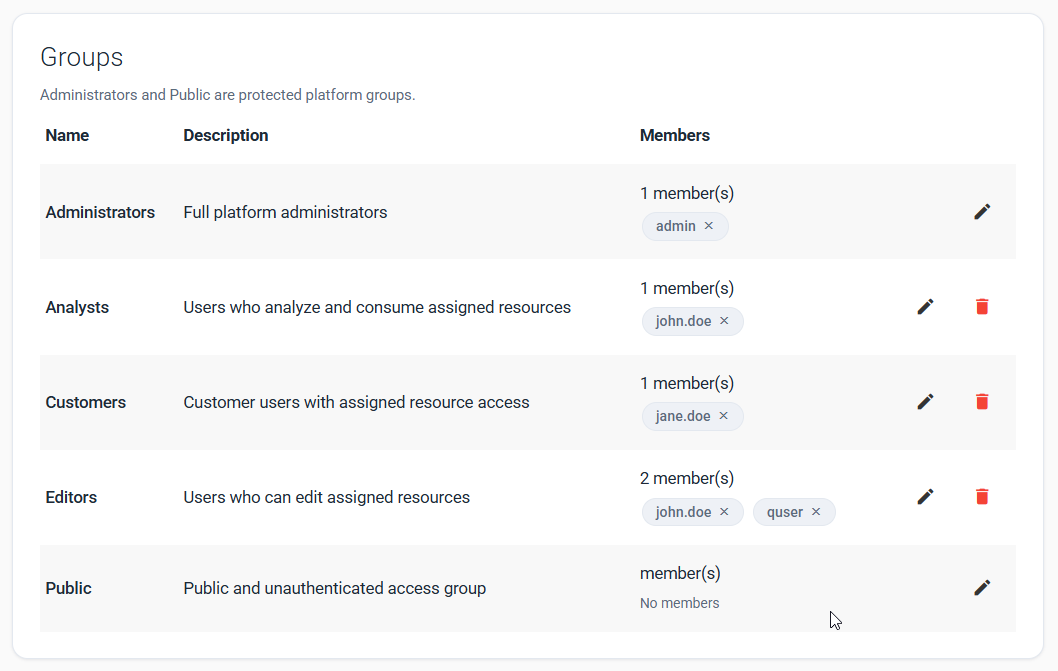
Caption: The Groups page summarizes each role, its purpose, current members, and available edit or delete actions.
Use this page to:
- Review the group name and description.
- Check the member count and member labels.
- Remove an individual member by clicking the x on the member label, when available.
- Edit a group with the pencil icon.
- Delete an unprotected custom group with the trash icon.
Check access before removing a member
Removing a user from a group can immediately remove access supplied by that group. Confirm that the user does not still need the role or receive required access from another group.
Create a Group
1. Open the Create group form
On the Groups page, select the option to create a group.
2. Define the role
Enter a unique Group name and a concise Description that explains who should belong to the group and what it is for.
3. Add initial members
Select a user in Add user to selected group, then click Add User. Repeat this action for each initial member. Click Save Group when the group definition is complete.
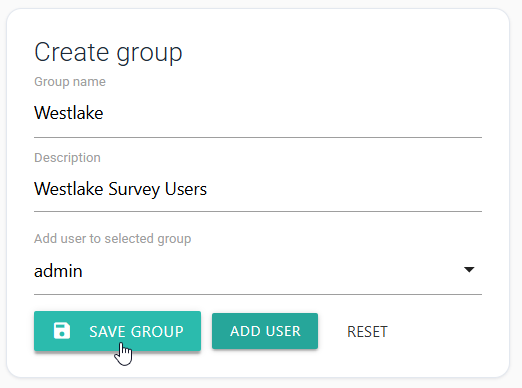
Caption: Define the custom group, optionally add users, and save it.
Describe intent, not just membership
A description such as “Westlake Survey Users” is more useful than repeating the group name. It helps future administrators decide whether the group is appropriate.
4. Verify the group
Return to the Groups list and confirm that the new name, description, member count, and member labels are correct. Assign the group the required resource permissions as part of your organization's access workflow.
Membership and resource access are related
Group membership identifies who receives the role. The group must also be granted access to the relevant platform resources for that membership to have the intended effect.
Edit a Group
Locate the group and click its pencil icon.
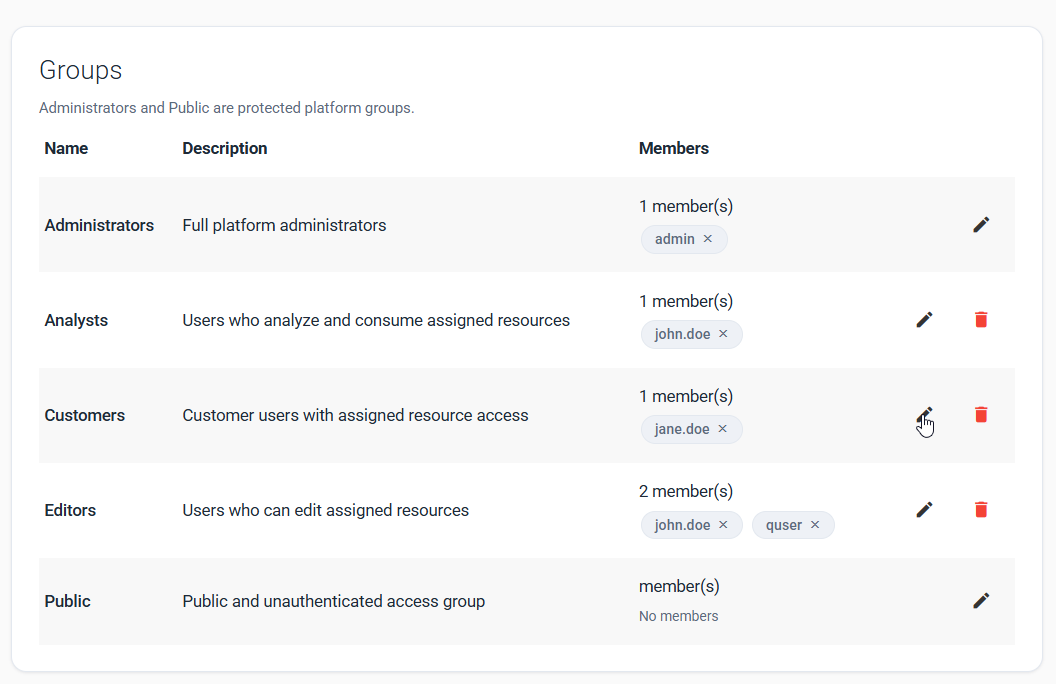
Caption: Use the pencil icon to change a group's definition or membership.
In the edit form:
- Update the description if the role's purpose has changed.
- Add or remove members as required.
- Save the group.
- Return to the Groups list and verify the member count and labels.
For a broader role change, also review the resources and permissions assigned to the group.
Delete a Custom Group
The trash icon appears for custom groups that can be deleted. Before deleting one:
- Confirm that no users still depend on it for required access.
- Record or transfer any resource permissions associated with it.
- Select the trash icon for the correct group and complete the confirmation.
- Verify that the group no longer appears in the list.
Deletion can remove access for multiple users
Group deletion affects every member. If the access change is temporary or uncertain, remove selected members or adjust the group's permissions instead.
Recommended Group Design
Group by responsibility
Prefer stable roles such as Analysts or Editors over groups named after individual users.
Separate administrative and daily work
Keep full administrator membership limited. Users who only create or edit content should use a narrower role for routine work.
Review membership regularly
Audit groups after staffing changes and at a regular interval. Remove stale members and update descriptions when a group's purpose changes.
Troubleshooting
A member does not receive the expected access
Confirm that the user appears in the group's member labels and that the user's account is enabled. Then verify that the group itself has permission to the required resource. Membership alone cannot grant a permission that the group does not have.
A user is missing from the member selector
Confirm that the user account exists and is enabled. Refresh the page after creating a new user. If the account is still unavailable, ask a platform administrator to check whether your account can manage that user.
The group cannot be deleted
Administrators and Public are protected platform groups and do not show a delete action. For a custom group, verify that you have group-administration permission and resolve any displayed dependency or validation message.
Removing one group did not remove access
A user can belong to multiple groups. Review all of the user's memberships and any public or direct resource access that may independently provide the same permission.
The wrong member was removed
Edit the group, add the user again, save, and verify the membership in the Groups list. Recheck the user's resource access afterward.